Install a WordPress Manually
This tutorial is to help all of you that are interested to easily setup a WordPress website in complete autonomy.
Following these simple instruction to manually install a new instance of the latest WordPress version.
I really hope that you will do it because it’s worth it !
Step 1. Download the WordPress
First thing to do it is to download the latest stable version of WordPress from the official website https://wordpress.org/download/.
This should transfer on your computer a zipped package containing all files and folder that will be uploaded to your web server.
Once the installation package (compressed) will be saved locally extract it to a new folder.
Step 2. Upload the WordPress Files to Your Server
Some hosting providers allows to upload and decompress zip files using the control panel File Manager. If this is your case move the zipped wordpress file to the root of your web folder (usually a folder called public_html) and decompress it remotely. You should login to your hosting account and check if among the available tools there is a File manager or web FTP link.
Otherwise you need to expand the wordpress installation package locally and then upload the extracted files and folders to your web server using an FTP client. You may use some free tools as Filezilla https://filezilla-project.org or CyberDuck https://cyberduck.io.
Step 3. Create a MySQL Database for WordPress to use
Before starting the installation process it is necessary to create a MySQL database and a MySQL user to it with full permissions. If you do not have idea on what is about you can find all you need to know explained in this tutorial Create MySQL Username and Database.
Remember to write down all information as the database name, database username and password! You will be asked to provide those information later on.
Step 4. The installation process
To start the installation you should open your favorite browser and visit: http://yoursitename.com/wp-admin/install.php
(Of course replace yoursitename.com with the name of your website !)
The first thing you will need to do is to choose your preferred language from a list. Once done click on Continue.
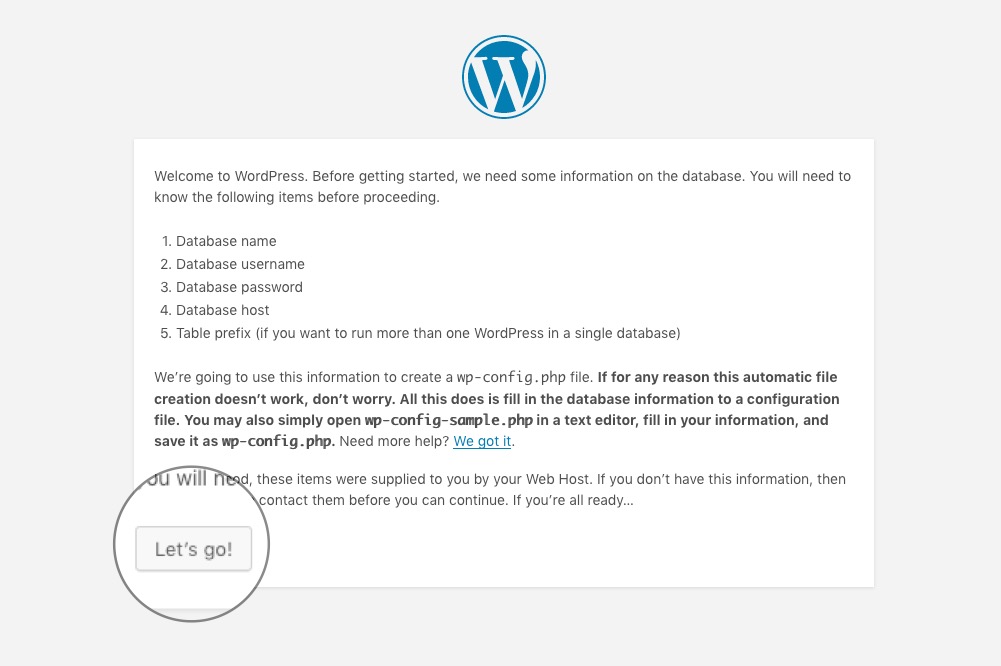
In the next page, you will welcome you and asking you to be ready to provide some information for the installation. Having noted all database and user information just press on the Let’s Go! button.
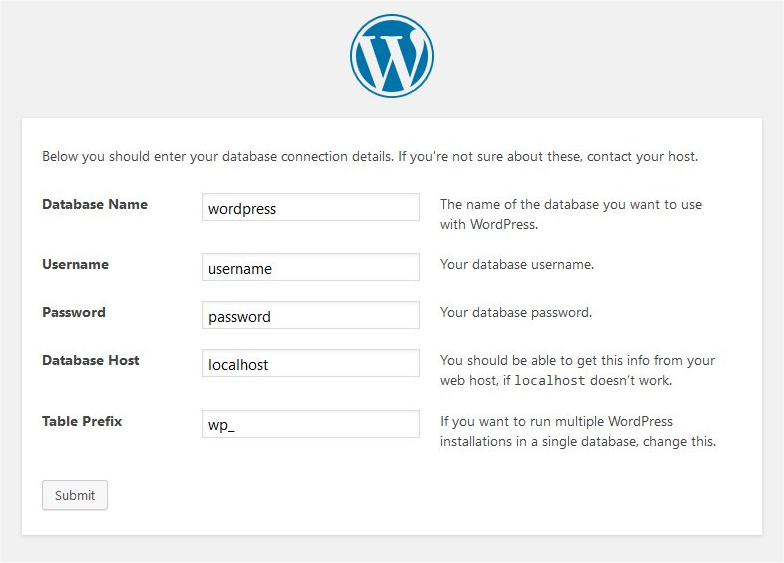
Now it is time to enter the database name, database username and password created in Step 3.
Those information are requested to allow WP to connect with the MySQL database. Again it is of the highest importance to use a strong password, the access of the database must be safe and protected !!
(You can also added directly all db information editing the wp-config.php file; it is a quite technical manipulation, you shouldn’t choose this way unless you feel confortable with FTP & PHP. In case you can refer to this page: https://wordpress.org/support/article/editing-wp-config-php/)
If the information you have entered are correct you will see confirmation screen pop-up; click now on Run the Installation button.
Step 5. Conclude the installation
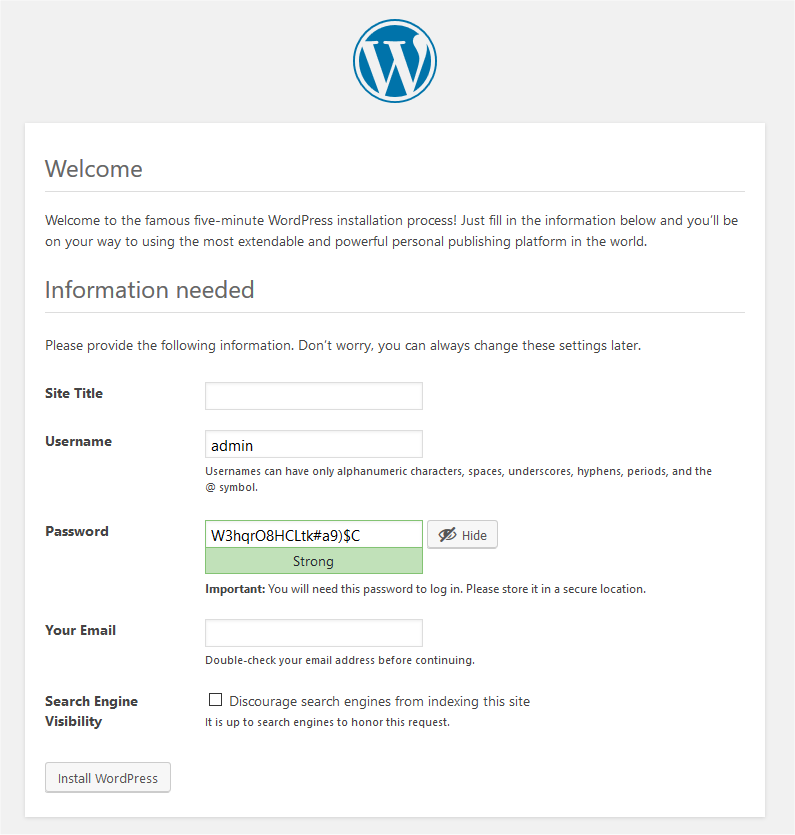
Finally, you must provide an administrative username (the WP administrator nickname) and the title of your new site.
Don’t be afraid to use a complex password, in this way your account will be better protected. Providing an email is crucial, it will save your day in case you forget the password. If the site is under developement you may choose to discourage the search engines to index your pages, this action can be reverted in the admin interface under Settings – Reading.
To conclude the installation press Install WordPress.
You did it!!
You can use the Log In button and start creating your content.
You can reach anytime the administration backoffice at this address: https://www.yourwebsitename.com/wp-admin